
Kale chips are a perfect snack. They’re crunchy, salty, and extremely nutrient dense, while being low in calories. But up until recently, I failed miserably at making them. That is until this Sesame Soy Kale Chip recipe resulted in success!
Kale is truly ideal in chip form, it’s fantastically crunchy and with the complex sesame and soy flavors in this recipe it’s so satisfying — you’ll never know it’s possibly the most nutrient-rich snack you’ll ever eat. The line-up of the most notable nutrients in kale is staggering: vitamin K, vitamin C, vitamin A, manganese, copper, calcium, potassium, vitamin B6, vitamin B2, and vitamin E. Honestly, as I write this post I’m kicking myself for not dialing in a kale chip recipe sooner. Better late than never, I guess.
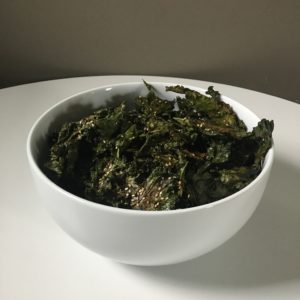
The recipe below is for one large bunch of curly kale but it can be easily doubled for a large batch. Once cooked, I store our chips in a large open air bowl on the counter for the few days it takes us to eat them and they stay perfectly crisp. They also hold up surprisingly well in baggies for travel. If you’re in a humid environment, once they’re cool, you will likely want to keep them in a sealed container, but I’m unsure of how how long they’ll stay crunchy.
- 1 large bunch organic curly kale
- 1½ Tbl toasted sesame oil
- 1 Tbl gluten-free soy sauce
- 1 tsp garlic powder
- 1 Tbl sesame seeds
- Pre-heat oven to 300°F.
- Wash and de-stem kale.
- Tear or chop kale into large bite-sized pieces.
- Dry kale.
- In a large mixing bowl whisk together the sesame oil, soy sauce, and garlic powder.
- Using your hands, place kale into the bowl and lightly massage the kale ensuring the pieces are evenly coated with the sauce.
- Place kale onto baking trays (you'll need two) in a single layer, taking care to not overlap any of the pieces. This will help ensure your chips are crispy!
- Place baking trays into the oven for 10 minutes.
- Remove from oven and sprinkle with the sesame seeds.
- Return trays to oven, but switch their order — the tray that was on the bottom now goes on top and vice versa.
- Bake for another 5-8 minutes. Monitor to ensure the chips do not burn.
- Remove from oven & let cool.
- Remove chips from trays with a flat spatula and enjoy!